Of the five swing planes defined by Mr Kelley, three are fixed, one moves during the swing, and the last can be set to different angles of steepness.(1)
The first plane we’ll look at is the Elbow Plane.(2) We’ll be viewing the swing planes from a “down the line” perspective. As previously explained in the Second Power Accumulator page of this website,(3) your perspective of the golf swing can change its appearance. Depending where you are viewing a swing from, a swing plane can look steeper or shallower than it really is. It can also look off plane when in fact it’s not.
So the first step to viewing, and especially recording, a golf swing is to make sure you’re viewing it from a neutral perspective which minimises distorting any angles and other geometric relationships we may wish to measure.
A good reference point is the hands at address. Position your camera at the same height as the golfer’s hands. Then move the camera so the hands are the centre of the viewfinder. Finally, direct the camera so that it is pointing towards the target. If you were to use this set up with each different golfer you recorded, you’d not only have a neutral perspective of them, but you’d be able to more accurately compare the different features of their swings, without having to take into account from where the recording took place and the relative heights of the different golfers etc.
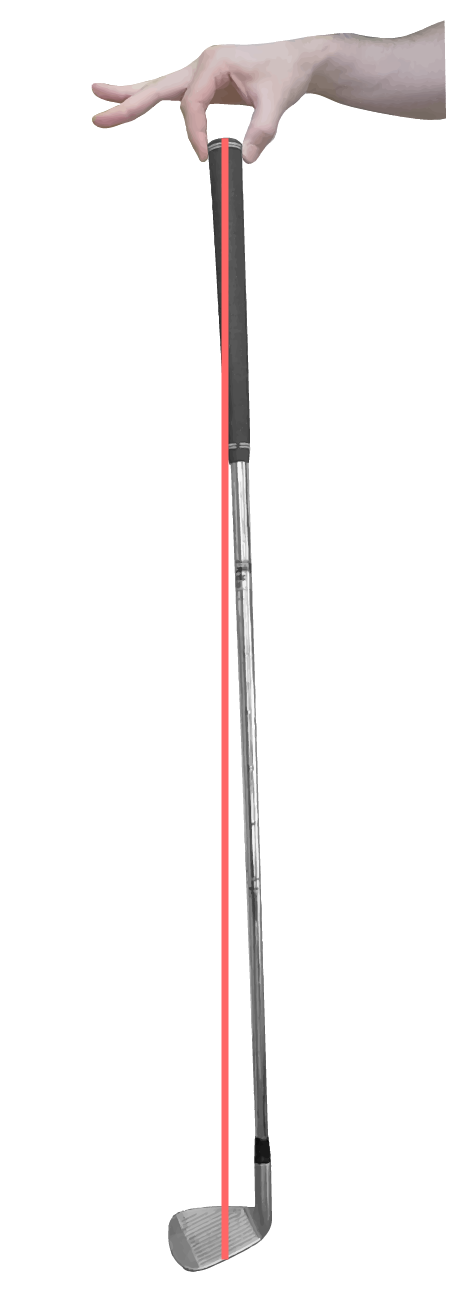
With our perspective fixed, now we can draw a line representing our Elbow Plane. In order to do this we need two points of reference. The first will be the same for all of our planes - the “sweet spot” of the clubface at address.(4) The sweet spot is located along the “longitudinal centre of gravity” of the golf club. For a rough estimate of this longitudinal centre of gravity, pinch the end of the grip with your finger and thumb and let the golf club hang freely. You’ll notice the clubshaft doesn’t point vertically downwards, it’ll be off by a few degrees. Directly below where you’re suspending the club will be the clubhead. A vertical line drawn from the end of the grip down through the clubhead, on the clubface will show you this longitudinal centre of gravity. It’s along this line centrifugal action pulls on the club during the swing, and again, where the sweet spot of the clubface is found.
Of course, looking “down the line”, we cannot see the clubface let alone where exactly the sweet spot is. The alternative we’ll use is the golf ball. After all, that’s what we’re aiming to hit with the sweet spot of the clubface.
You may have noticed some people using the hosel (or socket, if you prefer) of the club instead of the ball as the first reference point when drawing plane lines. This is because most folk use the clubshaft itself as the indicator of being on the swing plane. This isn’t strictly accurate, as the swing plane is the sweet spot plane, not the clubshaft plane. There will be times however on the back and down swing, where because the clubface is turned,(5) the clubshaft plane and the sweet spot plane are one and the same when viewing them from “down the line”. Because of this, Mr Kelley says: “Except for impact, the clubshaft is an acceptable visual equivalent for both planes...”(6)
With the first reference point established, now for the all important second. Mr Kelley states it’s: “where the right elbow touches the waist...”(7) Unless you have an unusual set up, your right elbow wont be touching your waist when standing at address. So how do we find this reference point? By following these instructions...
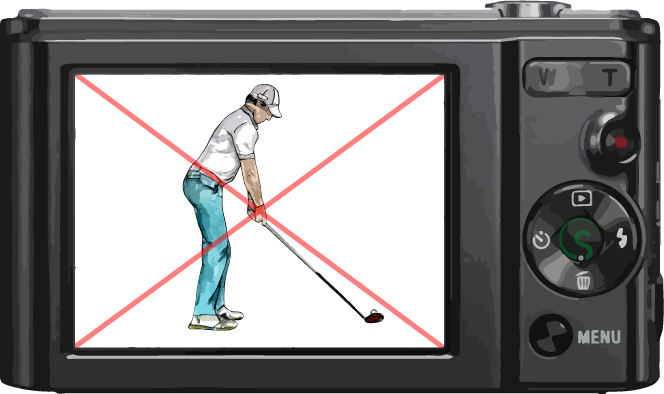
Firstly, we’re going to draw a straight line from the back of the neck (the C7 joint, as discussed in the Essentials chapter) down to the belt, or top of the trousers. This line, your axis tilt, we’ll call “A”.
The second line we’ll draw from your right shoulder, specifically the socket joint (the Glenohumural joint, as discussed in the Hinge Action chapter) down to the right elbow. We’ll call this “B”. This line, obviously, represents the distance from the shoulder joint to the elbow. Having established this length, we will create a new line the same length as “B”, but this time starting from the shoulder joint and laying parallel to line “A”. At the end of this new line, “C”, we find where the right elbow would be if it were touching the waist.
Now all that’s left is to draw a line, "D", from the golf ball through the end of line “C”, creating the Elbow Plane.
The Turned Shoulder Plane
